NOVEMBER 2023 TUMBLEWEED CLUB OF NEW MEXICO
RG #79, EARLY FORD V-8 CLUB OF AMERICA, PO BOX 21538, ALBUQUERQUE, NM 87154-1538
MEETS FIRST TUESDAY OF THE MONTH, 7:00 P.M., LOCATION TBA
V8
TIMES
PLEASE NOTE: All meetings include Show & Tell. Members are encouraged to bring items to share.
NEXT MEETING: Tuesday, November 7, 2023 at 7 pm at North Domingo Baca Multigenerational Center, 7600 Carmel NE, one-half block North and West of Paseo Del Norte and Wyoming. Program by our own Larry Azevedo.
NEXT BOARD MEETING: TBD
BREAKFAST GROUP: Saturday, November 11, 8:30am at Grandma’s K & I Diner with tour of Wheels Museum after.
CLUB WEBSITE: Be sure to check out our website at www.abqfordflatheadv8.com Updated “current Information and calendar” is on the current information page. More club pictures are on the website.
FORD V8 FOUNDATION WEBSITE: Another interesting website to check out is www.fordv8foundation.org
EARLY FORD V8 CLUB OF AMERICA WEBSITE: www.earlyfordv8.org
NOVEMBER 7TH MEETING
The November meeting will be held on Tuesday, November 7th, 7pm, at North Domingo Baca Mutigenerational Center. The program will be by our member Larry Azevedo. Larry will share his experience this year at the Montana 500: “500 miles at full throttle, a 98-year-old car and a 75-year-old driver – what can go wrong?!” Officers and Board Members for 2024 will be elected at this meeting. If you are not able to attend, there is a ballot elsewhere in this newsletter that you may fill out and submit. As usual, there will be a raffle with fun and interesting prizes.
November 11th Breakfast and Museum Visit
On Saturday, November 11th at 8:30 am, club members and friends will meet for breakfast at Grandma Warner’s K & I Diner at 2500 Broadway Blvd SE, just south of Gibson. After a delicious breakfast members will caravan to the Wheels Museum at 1100 2nd St SW. The Wheels Museum is an organization in the Albuquerque Rail Yards dedicated to collecting, preserving, and creating educational exhibits about the history of transportation in Albuquerque and New Mexico with emphasis on the impact on the development of the area. Their collections embrace the history of the railroads, the impact of the rail yards on Albuquerque, as well as automobiles, horse and wagon, and other modes of transportation. The Museum is located on the site of the historic Santa Fe Railroad Shops in downtown Albuquerque. Currently housed in what the Santa Fe Railyards once referred to as The Storehouse, a long and narrow structure built in 1914. Join us for an interesting tour.
President’s Message for November 2023 Chris Joiner

How is it time for another newsletter?? Some days, I wish time would slow down. Thank you to those who joined us on 10/14 for our cruise. We didn't make it as far as we had hoped, but we saw some pretty scenery.
We will be having club elections at our next meeting. Thank you to everyone who has agreed to be on the board for 2024. It is very much appreciated.
Minutes of the October 3rd Meeting
The meeting was called to order by President Chris. There were 25 members present and two guests, Jeff and Beth’s grandson Gabriel and Steve Schulties. Chris explained that Amy was in class so there was no treasurer’s report. Everyone reported receiving their newsletter. Chris wished everyone in October a Happy Birthday and a Happy Anniversary. He also thanked Joe Warren and the Abernathy’s for the snacks.
There was no old business. The State Fair report was that 14 cars came and the weather was good and it was a nice day for everyone. Beth said to look at the pictures on the club’s website. Joyce said she received compliments on the cars and the members.
The next board meeting will be October 12 at 6:30pm at Village Pizza in Corrales. If anyone wishes to be an officer or board member in 2024, please put your name forward.
Joe talked about the tour to Chimayo, wanting to switch it to October 7th instead of October 14th. However, no one was able to switch so it remains on the 14th. Eastside members will receive an email and westside members will meet at the former Joiner Car Museum on 528.
Steve Schulties reported that Jay’s Garage is open to view at Rust Hospital on the 3rd floor. The hospital is requesting that no more than five people visit it at a time. It is a wonderful display in Jay’s memory.
Joe Abbin brought tools and books for show and tell. He handed out cards with online access to his book on the Albuquerque Police Department.
We will all need to sign in at the front desk for meetings from now on so the Center has an accurate headcount of facility usage.
We had the raffle and delicious snacks.
The evening’s entertainment was provided by Lorna Azevedo. It was a very funny and educational skit about a switchboard operator working at the Ford Motor Company in the early days. It was better than Broadway and had everyone laughing. Thank you, Lorna.
Secretary Jackie Abernathy

November Birthdays and Anniversaries
Roger Wilbur (11) Vern & Pat Willan (7)
Ray Calderon (30) David & Debbie McLain (10)
Philip & Corrine Lovato (14)
2023 OFFICERS & DIRECTORS
President: Chris Joiner (amy2001tweety@hotmail.com) 505-382-8723
Vice-President: George Abernathy (docszoo22@gmail.com) 505-771-2113
Secretary: Jackie Abernathy (docszoo22@gmail.com) 505-269-4010
Treasurer: Amy Joiner (amy2001tweety@hotmail.com) 505-382-8724
Director: Joe Abbin (roadrunnerengr@msn.com) 505-263-1946
Director: Larry Bost (LBost111@gmail.com) 505-379-7891
Director: Don Gutierrez 951-241-4959
Director: Jeff Jackson (jbjaxun@gmail.com) 505-908-7565
Director: Bill Joiner (joinerenterprise@cs.com) 505-238-1794
Director: Joe Warren (jbwarren302@gmail.com) 505-554-1387
Director: Roger Wilbur 505-603-5031
6-volt electrical tips and tricks
STARTERS:
The starter current draw on a Ford V-8 through 1948 is 550 amps (does not include V-8 60's). The starter cranks a stock flathead engine at 100 rpms. The 1949 - 1951 engines crank 130 rpm (without an automatic transmission)
GENERATOR DOES NOT CHARGE:
Two brush Ford generators use the shunt type generator design. The field circuit has an internally grounded field, unlike MoPar and GM which ground through the regulator. To test a Ford generator and/or regulator on the car, simply ground the field terminal at either the generator or regulator with the engine turning about 1000 rpm and watch the amp gauge (do not disconnect any wires). Grounding the field removes all external regulation on the generator and it will go immediately to full charge mode. If the ammeter shows charge when you ground the field, the regulator is at fault. If the ammeter does not show charge, the generator is defective. Note the generator may have shorted out the regulator when it went bad.
Since the 6-volt regulators are still mechanical and can be set, it may be beneficial to know what is where inside of them.
· the cutout relay is directly behind the BAT terminal
· the current relay is directly behind the ARM terminal
· the voltage relay is directly behind the FIELD terminal
When an emergency occurs on the road, the regulator can be adjusted in an attempt to coax a defective regulator into working. To increase any of these settings, remove the cover and bend the rest that the flat spring rests upon upward. Bending should be minor in nature, don't exceed 0.020".
If the generator charges when you ground the field, it's possible to rig up a ground on the field terminal to charge the battery in an emergency. Remembering that this will cause the generator to go to full charge, it is only logical that such action will cause the generator to overheat. Which will eventually melt the solder in the armature and ruin it. To prevent this excessive overheating, only ground the field for 10 minutes maximum at a time.
If you want to keep driving and not have to keep stopping, connect an insulated wire to the field terminal of the regulator or generator and route it to the inside of the car. Bare the end of this an inch or so and wrap it around something grounded (like an ashtray) when you want to charge the battery.
POLARIZING A 2 BRUSH FORD GENERATOR:
Disconnect the FIELD terminal wire at the regulator and momentarily touch this wire to the BAT terminal of the regulator. NEVER use a jumper wire to keep from disconnecting the field wire at the regulator it'll ruin the regulator in a hurry.
The field wire MUST be disconnected from the regulator. MoPar and GM generators are not polarized in this manner due to their different design.
DIM LIGHTS:
Dim lights are usually caused by low voltage to the light or by a weak ground. Naturally the battery must be charged with good clean posts. The wires in a 6-volt system are considerably larger than in a 12-volt system. Be certain that any wiring you've done is at LEAST as big as what your Ford came with to keep from choking the system. Usually, the culprit is in the ground, or rather the lack thereof.
The 6-volt battery should have the positive battery cable connected directly to the frame. Naturally the frame under the cable needs to be scraped bare and bright to function as a good ground. Make certain the frame and body are grounded by bolting a ground strap between them. Next thing is to make sure the bulb socket has a good ground between it and the frame. Clean the inside of the socket with some steel wool or sandpaper until it's shiny and bright. Many of these sockets are pressed into the reflector and this electrical union begins to fail electrically over the years. When in doubt, solder a length of wire to the brass socket itself and temporarily ground it directly to the frame. If this cures the dim light, you'll know exactly where the problem lies and what's needed to correct it.
If you're running the stock 6-volt head light bulbs and they're something in the neighborhood of 25 watts, replace them with some 50/32 bulbs. It does wonders for them. Bert's Model A Center has these in stock.
Sometimes you have a bulb that is not burned out but refuses to work in the socket. Could be the contacts are worn down too much. Just drop a little solder on these and they'll work like new.
ELECTRICAL TERMINATIONS:
I'm always amazed at the number of these I find that are bad. We go to great lengths to cut the wire exactly the right length and to trim back the insulation just the right amount and crimp the new terminals neatly. These terminations usually function perfectly for some time and then the electrics start giving trouble. After much frustration and messing around, we may finally get them to start working again. More often than not, they soon start acting up again. Many times, I finally track the problem down to the crimped termination itself. At first the newly crimp works and current flows. Eventually oxidation starts and the resultant insulating occurs. The result is the crimped terminal becomes partially insulated between the wire and the terminal. Sometimes the crimp itself relaxes its hold due to heat and compression and the conductor becomes loose in the termination. To keep this from happening, I trim back about 1/16" more insulation than is needed. I push the bare wire clear through the insulated part of the termination so that it extends 1/16" beyond it. Then, after I have crimped the insulated part of the terminal, I solder the 1/16" bare conductor solidly to the electrical terminal. Now it can't get loose or become insulated by oxidation. I've never had one fail when doing it this way. I solder all electrical connections. .
As far as using the insulated crimp type splice connectors to splice two wires, I will not use them under any circumstance. I just don't trust them since I've seen some burned-up wiring caused by the wires pulling free of the splicing connector. I bare the two wires and do not twist them separately or together. Instead, I push them straight into each other, so the wires are intermixed with each other. After smoothing them out and squeezing them with pliers, I flow solder into this mix to make the splice permanent. I finish by using heat shrink tubing to cover the newly soldered splice. A trick I use here is to squeeze the soldered connection with pliers while it's still warm to reduce any blobs or peaks of solder so the heat shrink tubing will slide over the splice easily. As far as male "bullet" connectors used in most early cars, I've always had trouble crimping them enough to hold them and still have them fit into the round female connector. I remove the insulated material from the bullet connector (grind a slot along one edge of the insulating area with the edge of the bench grinder and the insulation will pull right off). Then I bare the conductor just enough so the wire will just barely go all the way into the bullet. I flow solder into the bare bullet connector without ever crimping it. After it's cooled, I slide some heat shrink tubing onto the bottom of the bullet and shrink it with a match.
Another thing I do is make all my battery cables. Seems the ones I purchase are always the wrong length, usually the wrong color, and I'm unsure as to how good they crimped the connectors onto the cables. I watch for long cables at the flea market and at swap meets. I use battery/starter terminations from my local parts store. I cut the cable to the exact length I want. Then I strip back the insulation, install and solder the new terminations to the cables. I finish them by using heat shrink tubing (sometimes two layers)
DISTRIBUTOR VACUUM ADVANCE: The 1948 and earlier Ford engines have a
different type of vacuum advance than we normally encounter. Intake manifold vacuum is routed to an internal brake inside the distributor. The amount of brake that's applied to the centrifugal weight
advance mechanism controls the degrees of advance. When vacuum drops, the brake spring overcomes the vacuum that is holding the brake away from rubbing against the centrifugal advance mechanism. The more spring tension there is being exerted against this brake, the sooner the brake is activated and the sooner the centrifugal advance mechanism is stopped thereby controlling the amount of advance.
To increase the spring tension and decrease the amount of centrifugal advance, turn the advance screw inwards. To decrease the spring tension and increase the amount of centrifugal advance, turn the advance screw outwards.
The vacuum advance screw is used to eliminate detonation.
To adjust initial (static) advance, loosen the lock screw on the side of the distributor and move the advance screw/plate up or down. As viewed from the front of the engine, moving the advance screw & plate clockwise advances the timing.
SETTING STATIC TIMING ON '42-'48 V-8 DISTRIBUTORS:
Stock Ford specifications call for the initial (or static) timing to be set at 4 degrees BTDC (Before Top Dead Center). This is best set on a distributor machine. In the absence of one, it can be set using common tools. The following is from a Ford service bulletin for' 42-' 48 distributors.
[1] Remove the distributor and adjust both sets of points to 0.014". Loosen the vacuum brake screw lock nut and back the screw out several turns. Loosen the advance screw/plate screw on the side of the distributor and verify it moves up and down easily. We must move this advance screw/plate to set the timing, so we need it to move easily.
[2] Connect up a continuity test light. Connect one lead of the test light to the screw stud the wire from the coil is connected to. The other test lead is grounded to the distributor housing.
[3] Now turn the distributor upside down so you're looking at the back of it. Notice how the distributor drive has a wide side and the tang is offset? Turn the distributor drive so the wide side is towards the condenser. Position a straight edge on this wide side (holding it snug up against the tang) in such a way that the straight edge extends to the outside of the driver's side of the distributor housing. Rotate the distributor drive and straight edge until there is exactly 3/8" from the top of the driver's side distributor mounting hole to the straight edge. This is 4 degrees BTDC. Holding the distributor drive and distributor firmly so they cannot move, slide the advance screw/plate up and down until the continuity light just flickers. This is when the left set of points are just breaking open and is when the distributor fires. Tighten the advance screw/plate. In Denver, I just adjust the vacuum brake adjuster out until the engine pings (detonation) under 35-40 mph high gear acceleration and then turn it back in one-half turn. This adjusts for altitude as well as the type of fuel we're using. The vacuum controlled centrifugal weights should be adjusted to be 25 to 28 degrees at 2000 rpm at sea level.
DETONATION: Detonation is the uncontrolled burning of fuel during combustion. It can lead to pre-ignition, "running on", burned pistons, cracked piston skirts, and deform piston ring grooves/lands. Sometimes it's hard to detect light detonation while driving due to road noise etc.. However, detonation will leave its mark in the spark plugs. This appears as a dark ring around the porcelain on the inside of the plug. If a detonation ring is present, retard the spark or possibly go to a colder plug or possibly increase the main jet size or increase the octane of the fuel you're using, or do a mixture of them all! If your compression is high like mine, I must add an octane enhancer when I go down to a lower altitude. My 9.95: 1 compression really sounds off when I get near sea level!!!!!!
COIL CONNECTIONS:
On a positive ground system, the feed from the ignition switch is to connect to the negative marked terminal on the coil. If connected wrong, the coil output will be about 14% less at idle. This percent of reduced coil output increases to as much as 30% as rpm' s increase. The decreased coil output causes hard starting and poor performance.
COIL TESTING USING OHMS:
Coils can be checked using the Ohm function of a VOM. To measure primary resistance, connect one lead to the ignition terminal of the coil and the other to the distributor terminal of the coil. The resistance should be between 0.7 and 0.8 Ohms.
To measure the secondary resistance, connect one lead to either the distributor or ignition terminal of the coil and the other lead is inserted into the high-tension tower. It must make contact with the metal inside. The resistance should be 6500 to 7500 Ohms. If either measurement falls outside these values, the coil is probably on its way to being junk or has already arrived. These ohm values are only for genuine Ford coils since each manufacturer has different values for their product. This is not a fail-safe test, but I've used this for years as a guide for coils with good results. It's especially quick and easy to use at a swap meet.
Article submitted by Joe Abbin, Author information is lost.
Newsletter Note
Members are encouraged to submit articles, ads, and photographs for inclusion in the newsletter. Please understand we have a volunteer Newsletter Editor so try and submit typed and proofed articles, comments, and new want ads. The deadline for submissions is the 20th of the month. Beth Jackson, 505-908-7564, or email: JBJaxun@gmail.com
Christmas Party
Make sure you keep a spot open on your calendar for our potluck Christmas Party on Saturday, December 9th, 1PM in Rio Rancho at George Abernathy’s warehouse adjoining Sonrise Veterinary Clinic. Details will be in the December Newsletter.
BALLOT
President – Joe Abbin ______________ Write-In Candidate __________________________
Vice-President – Chris Joiner _________ Write-In Candidate ________________________
Secretary – Jackie Abernathy _________ Write-In Candidate __________________________
Treasurer – Amy Joiner ______________ Write-In Candidate __________________________
Directors: Vote for seven or write one in.
George Abernathy ___________
Joe Baird __________________
Larry Bost __________________ Write-In Candidate __________________________
Jeff Jackson ________________
Liz Johnson _________________ Write-In Candidate __________________________
Bill Joiner ___________________
Roger Wilbur ________________
When your ballot is completed, you may email to JBJaxun@gmail.com or mail to
Tumbleweed Regional Group Early Ford V-8 Club of America, PO Box 21538, ABQ NM 87154-1538

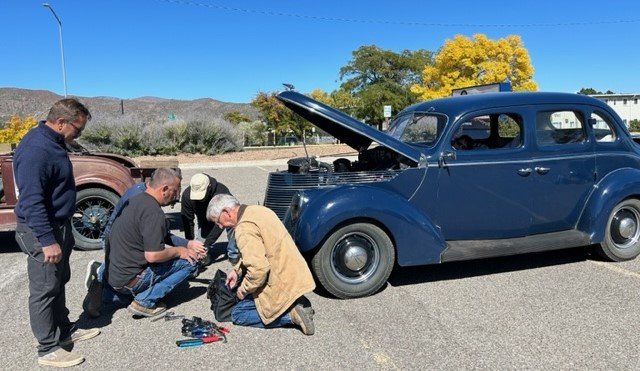


October 14th Tour Pictures
NOVEMBER 2023 CLASSIFIED ADS
For Sale: Radiator for 1953 Ford P.U. - very good $150. Gary McGlasson 505-250-1586
For Sale: 1936 Ford Cabriolet, $30,000. Tan exterior, LeBaron-Bonney interior and top. Working radio in box with correct controls is included. Extra parts go with the convertible. Bob Quirici 505-821-1646 or 505-350-2454
For Sale: 1955 Chevrolet BelAire. Gets lots of attention. Runs well. 283/Th350/10-bolt, 2.70 gear/no power/no ac/front disc brakes. $35K OBO. Joe Abbin 505-268-6768 office 505-263-1946 cell.
Storage: Outdoor $25/month, secure yard. Joe Abbin 505-296-7678
For Sale: 1926 Model T, Roadster Project. Jim Clements 505-884-7912
For Sale: 1953 Ford flathead V-8. Partially dis-assembled but complete. Many new and used parts including two transmissions, new water pumps, etc. To be sold as one lot.
Gary Bachman, gbach2736@gmail.com, 505-850-9026
Wanted: 1939 Ford ½ ton rear fenders, floorboard and rear bumper assembly. Contact Daniel at dperea@q.com.
Services Offered: Vintage engine rebuilding, any make, any model. Stock or modified. Dynamometer testing available. Results guaranteed. References available. Gary McGlasson, 505-250-1586.
Tumbleweed Early Ford V8 Club Calendar for 2023
November
Tuesday 7th – 7pm Club Meeting at North Domingo Baca Multigenerational Center – Program by Larry Azevedo. Elections of new officers. Refreshments Jacksons.
Saturday 11th – 8:30am Breakfast at Grandma Warner’s K & I Diner followed by visit to the Wheels Museum
December
Saturday 9th – 1 pm Potluck Christmas Gathering at George’s Warehouse
Businesses Used by Members
(Send us names of businesses you have used)
1. Starters and Alternators of New Mexico, 3711 Franciscan St NE, Albuquerque NM 87107, 505-344-5025, Eldon.
2. Skinners Carburetor & Distributor Service, 3100 Pan American Fwy NE, Unit 6, Albuquerque, NM 87107, 505-344-3704, Albert & Nic.
3. McBride’s Springs & Welding, 1010 2nd St NW, Albuquerque NM 87102, 505-242-2174.
4. Old Car Garage/World Wide Automotive, 3232 Girard Blvd NE, Albuquerque NM 505-881-2722, Bob.
5. The Santa Fe Detail, 7512 Avenger Way, Unit 2, Santa Fe NM 87507, 505-204-5120, Luis.
6. Horizon Auto Glass & Tint, 8201 Menaul Blvd NE, Albuquerque NM 87110, 505-897-9000, Rod Williams. Also at 1560 Deborah Rd SE, Rio Rancho NM 87124, 505-822-1717.
7. Wild Heart Ranch Texas, 3120 FM 1995, Van TX 75790, 505-908-7565